First, make a step using a simple polygon cube. Design it however you like. I kept the original step at translations, 0,0,0 for simple reference.

Next, duplicate it by holding shift and pressing D. Then in the translate options, space it apart. I entered 1.5 for Y and -3 for Z for example.

Duplicated it again by holding shift and pressing D until you get the amount of steps you want. In this example, I had 30.


Make another polygon cube and positioned it under the bottom step as shown below. It is useful to press R for the rotate scale to make sure it fits as shown below. Check the other views to make sure it is aligned properly with the steps.


Scale the cube down to fit a single step but leaving a bit of extra space.
Then duplicate it by pressing shift and D and scale it to fit around the next step as shown below.


Repeat by holding shift and pressing D until all the steps have been covered.

Some of the steps may not fit inside those blocks. If this happens, one way to fix it is to first select all the surrounding boxes, make sure you're in the Polygons menu and then go to Mesh menu and select Combine.


Place the pivot at one of the corners and then use the rotate tool to make sure all the steps are covered.

It may also help to put the pivot in other positions for a better view of what is being affected.


Bring the polygon cubes that are "covering" the steps down so that they are underneath the steps. This will make the steps are more visible.

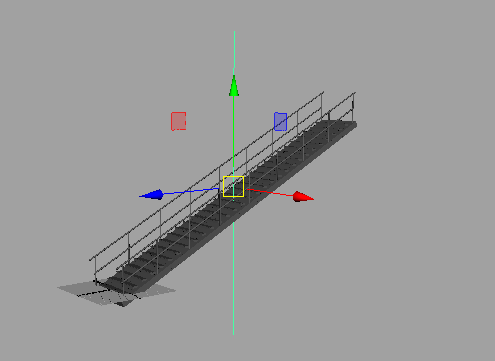
To make the railing, start with a simple cylinder and place it in the bottom corner of the block underneath the steps.

Use the other windows to find the right place to place it.

Once you have done that, duplicate it to make the pole for the other side. Place it there yourself or put a - (negative) side before the number in the Translate X input box. In this example, it was -7.218.


Shift and select these and then duplicate them. Place them a few steps above where you feel would be appropriate.


Shift and press D to keep duplicating them until they go up the stairs perfectly.


Next for the top bar of the hand railing, make a polygon cylinder and rotate and scale it so it fits on the top of the poles. It is helpful to use the side view for this.


Duplicate it and place it above the poles on the opposite side. Again put a negative sign (-) before the value in Translate X or place it there yourself.


For the second railing simply select the two top rails, duplicate them and move them below as shown in the pictures below. Place more if you feel they will be appropriate.


While still in the Polygons menu, select every single object in Object Mode and then go to the Mesh menu and select Combine.

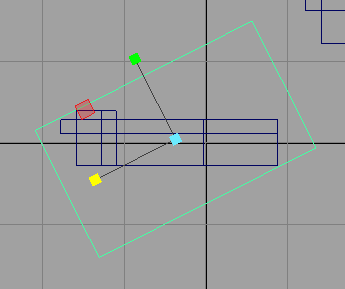
Next go to the Animation menu and in the Create Deformers sub menu, select Nonlinear and then the options box next to Bend.

When the "Create Bend Deformer Options" box is open, you should click "Reset Settings" under the Edit menu just to ensure it turns out okay. You can make some adjustments to the curvature of the staircase right there if you like or just click "Create" to create the bend deformer.

Rotate it to 90 degrees under the Translate X value.

The bend's default name should be "bend1" unless you made a previous one. In the attribute editor, play with the curvature value to get the desired effect.

Putting 70 or -70 in the curvature value will give it one significant curve.

Taking the curvature value to either the extreme of 180 or -180 will give it a much more spiral-like effect.

Adjust the low bound value if you would like to straighten the top of the staircase to however much you like.

Adjust the high bound value if you would like to straighten the bottom of the staircase to however much you like.

Adjust the envelope value if you would like to tweak the curves further. Making the envelope value 0.500 while the curvature value is at one extreme will make it look unrealistic.

Reducing the envelope value to zero will completely straighten the staircase even if the curvature value is at the extreme.

Simply duplicate to make and position accordingly to make it longer if you wish.

If you want to make stories, put platforms between the staircases where appropriate. Below is obviously a very basic example with a very primitive polygon cube.

If you feel the polygon beneath the steps is too thin, simply select the bottom edges and drag them down. It should not deform it unless you take it down too far.


No comments:
Post a Comment